
Planted Tank LED Light Product Chooser: PAR at Depth
A planted tank LED light product chooser that picks a fixture by PAR at the substrate, spectrum, and control, so your plants grow without feeding algae.
Samuel Reed · Published 2026-10-04 · 16 min read
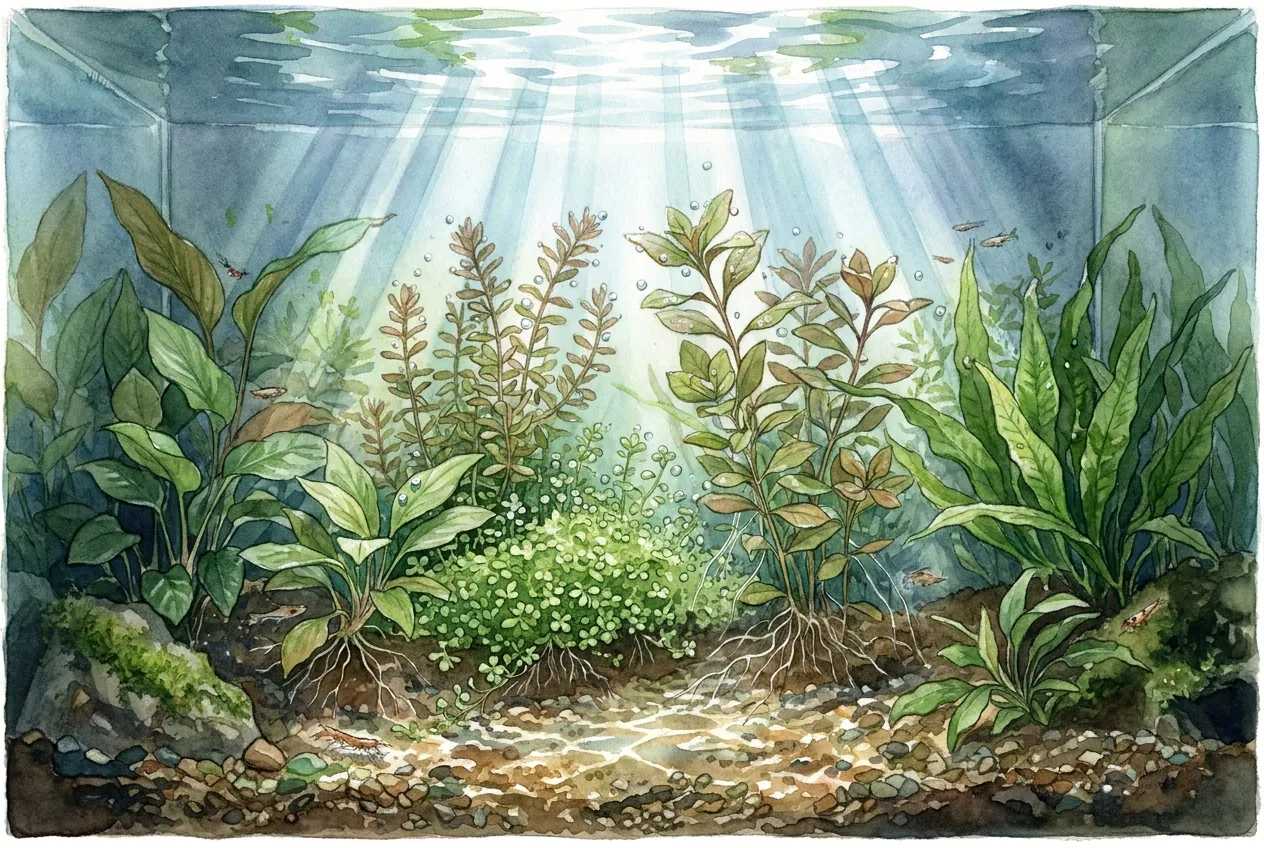
Key Takeaways
- Compare fixtures on PPFD at the substrate, not lumens, which are weighted to the human eye.
- Match light to your plants, since low-demand species saturate early and extra light feeds algae.
- A tall tank needs a stronger fixture because light fades sharply through the water column.
- Buy one high-ticket fixture only if carpets or bright stems justify it, otherwise go budget.
- A dimmer, a fixed 6 to 8 hour photoperiod, and a drop checker keep light and CO2 in balance.
Choosing an aquarium LED for a planted tank is really three measurable questions stacked on top of each other.
How much light reaches the substrate, what spectrum it carries, and how tightly you can control the daily dose.
Get those right and the plants you want will grow without handing surplus light to algae.
This hub solves the buying decision with numbers you can check, not brand loyalty. The plant-light mechanism sets the spec checklist, and the checklist is what each product below has to clear.
The buying order by role
Decide in this sequence, by role, before you look at any brand.
- Pick the fixture first, sized so it lands enough light on the substrate for the plants you actually want, at your tank’s water depth.
- Add control second, meaning a dimmer plus a daily on and off schedule, either built into the fixture or supplied by an outside timer.
- Add a carbon balance tool third, but only if you inject CO2 and plan to run a brighter setting.
- Choose the budget tier last, taking the cheapest class of fixture that still clears the light-at-substrate requirement for your plant list.
Match the fixture to the plants and the depth, not to a price or a lumen number.
Low-demand plants such as Anubias, Java fern, Bucephalandra, and most mosses thrive at modest light and need no CO2, so a budget fixture is usually the correct answer.
Carpets and bright-light stems need far more light at the substrate and matching CO2, which is where a programmable full-spectrum fixture earns its cost.
A tall tank always needs a stronger fixture than a shallow one to put the same light on the bottom, because light fades sharply on the way down.
Why light at the substrate is the number that matters
Aquarium plants respond to light along a photosynthesis-irradiance curve. Below a low threshold called the compensation point the plant cannot even cover its own respiration.
Above a higher threshold called the saturation point, extra light no longer speeds photosynthesis at all.
A 2026 study of three common submerged plants measured these thresholds directly. Compensation points varied by species and growth stage, from the mid tens up to a few hundred micromoles.
Saturation was not reached until several hundred micromoles, and it climbed higher as the plants matured.
The practical lesson is blunt.
Once a plant is light-saturated, extra brightness does nothing for it and is left over for algae instead.
That surplus is the mechanism behind most planted-tank algae. More light is not automatically more plant growth. More light beyond what the plants can use, without matching carbon and nutrients, is mostly a subsidy to algae.
Light fades fast through water
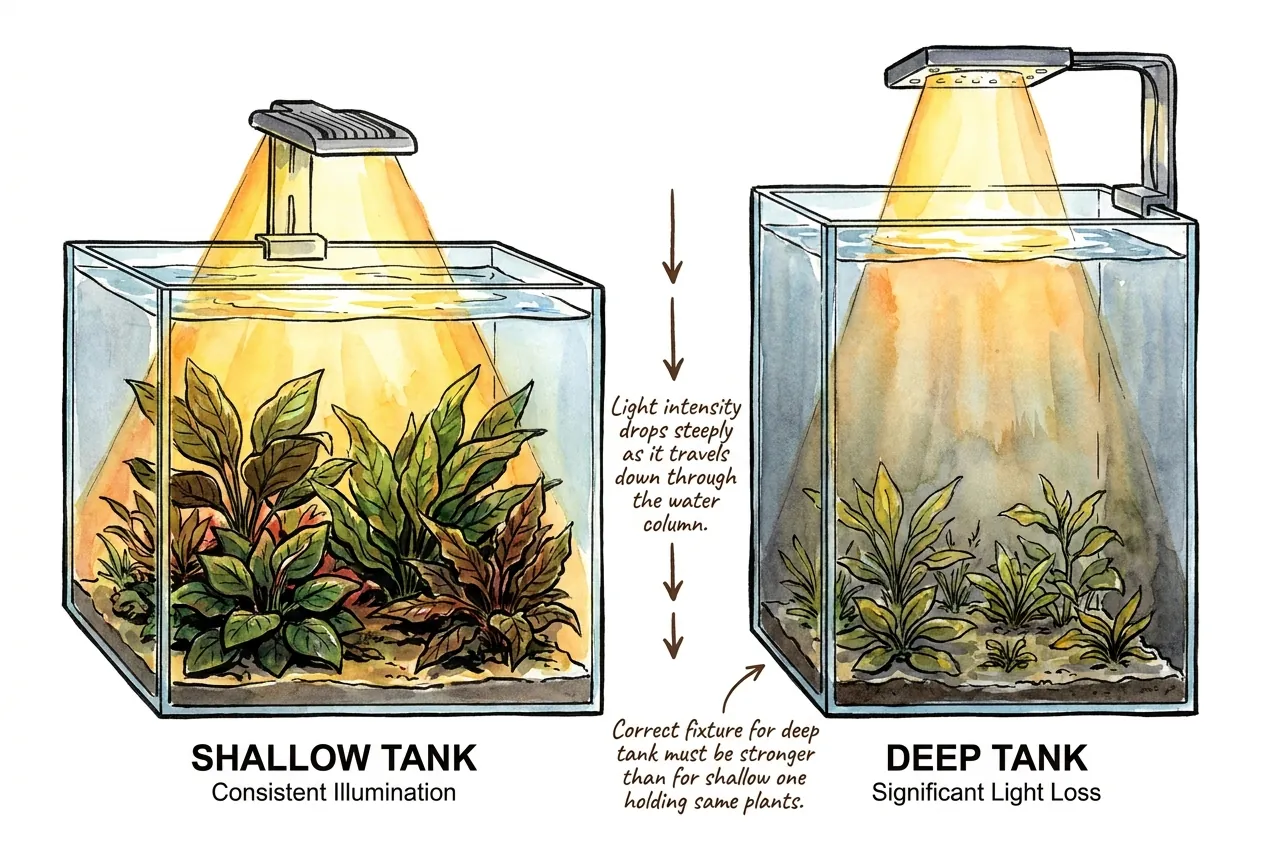
Light intensity drops steeply as it travels down through the water column. The deeper your substrate, the smaller the fraction of surface light that reaches it. A fixture that looks powerful at the glass line can be modest by the time its light reaches the bottom of a tall tank.
Iowa State University Extension puts the distance effect plainly. A fixture closer to the leaf delivers more intensity over a smaller area than the same fixture mounted higher.
This is why the correct fixture for a deep tank is stronger than the correct fixture for a shallow one holding the same plants.
Why lumens and lux mislead you
The number printed largest on cheap fixtures is usually lumens, and it is the wrong number for plants.
Lumens and lux are weighted to the human eye, which is most sensitive to green and underweights the red and blue photons plants use heavily.
A green-tinted light can post a high lumen rating while doing little for growth.
The standards vocabulary for plant light is different. ANSI/ASABE S640 defines the useful waveband as PAR, from 400 to 700 nanometers, and the amount landing on a surface as PPFD, measured in micromoles per square meter per second.
When a manufacturer publishes PPFD at a stated depth, that is the honest intensity number to compare.
Compare fixtures on PPFD at the substrate, never on lumens.
The specs that actually decide the purchase
A good fixture publishes numbers you can line up side by side. The table below is the comparison that matters, with the marketing noise stripped out.
| Spec | What to compare | Why it decides the outcome |
|---|---|---|
| PPFD at substrate | Micromoles per square meter per second at a stated depth | The only intensity number that predicts plant growth and algae risk |
| Spectrum | Full or RGB with white, versus blue-heavy blurple | Shapes plant color rendering and spectral control, not raw growth |
| Coverage | Length range in inches and beam spread in degrees | Decides even coverage versus bright center and dim corners |
| Control | Dimmer steps plus a daily scheduler or ramp | Lets one fixture serve low and high regimes and caps algae-feeding surplus |
| Power | Watts and mounting style | Running cost and whether it fits your rim or needs legs |
Roughly how much light your plants want
Hobby practice groups light at the substrate into working bands. These are practical targets for matching a fixture to plant demand, not a published standard, and they sit well below the saturation points measured for aquatic plants.
| Regime | Approx. PPFD at substrate | Typical plants | CO2 needed |
|---|---|---|---|
| Low light | About 15 to 30 | Anubias, Java fern, Bucephalandra, mosses | No |
| Medium light | About 30 to 50 | Many Cryptocoryne, easier stems, some swords | Helpful |
| High light | About 50 and up | Carpets, red stems, demanding aquascapes | Yes |
Buy for the brightest regime you truly intend to run, then dim down, rather than buying weak and wishing you had more.
The fixture that earns a bigger budget
When your plant list includes carpets, red stems, or a demanding aquascape, the high-ticket role is a programmable full-spectrum fixture with a published light profile.
The Fluval Plant 3.0 is a clear example of the class, and it is the one item here worth spending triple digits on.
Its manufacturer light profile lists about 545 micromoles at 3 inches, 270 at 6 inches, 113 at 12 inches, and 71 at 18 inches.
Those numbers mean it clears the medium and high bands at the substrate on typical tank depths, then dims down for a low-tech setting.
It carries six LED band-waves for a full, color-accurate spectrum, a 120 degree spread, and an IP67 waterproof rating.
A Bluetooth app programs a daily sunrise, midday, sunset, and night cycle.
The honest tradeoff is that this is overkill for a shallow bowl of Anubias, where its surplus light simply raises algae risk.
It is also the priciest option in its own lineup. Buy it when the plants justify the light and you want one fixture that handles both a bright planted phase and a calmer one.
The budget fixture for a low-tech tank
If your plants are all shade-tolerant and you run no CO2, a lower-output fixture is not a compromise, it is the correct match.
The NICREW ClassicLED Plus covers this role under one hundred dollars.
It uses a full-spectrum array of white, blue, red, green, and purple LEDs with a color rendering index near 91.
It adds an adjustable brightness control and a built-in daylight and moonlight cycle.
Its light output is modest by design, which is exactly what low-demand plants want. For Anubias, Java fern, Bucephalandra, and mosses, that lower light grows them steadily while giving algae little surplus to exploit.
The tradeoff is the mirror image of the hero fixture. That same modest output is a false economy for carpets, tall tanks, or bright-light stems, which will stall or grow leggy beneath it.
Choose it by your plant list, not by the price alone, and step up to a stronger fixture the moment your ambitions include a carpet.
The control that caps algae
A fixture without a schedule leaves the daily light dose to whenever you remember to flip the switch.
Erratic switching tends to leave light on longer than plants need, and that surplus feeds algae. A repeatable photoperiod fixes this.
If your fixture has no built-in scheduler, an outside timer supplies one. The Kasa Smart Plug is a 15 amp, UL certified Wi-Fi outlet with app scheduling, a countdown timer, and a selectable state after a power outage. It needs no separate hub.
Used on a planted tank, it enforces a fixed photoperiod of six to eight hours and can run a midday break. The light then turns itself off on schedule every day.
The limitation is simple. It is redundant if your fixture already schedules itself, which the hero fixture does, so buy it only to automate a fixture that cannot.
The carbon check for brighter tanks
Raising light raises a plant’s demand for carbon. If you push a medium or high setting without enough dissolved CO2, the plants cannot keep pace and the leftover light again favors algae.
A drop checker is the cheap instrument that tells you whether carbon matches the light.
The NilocG CO2 drop checker is a small glass chamber with a suction cup that ships with a 4 dKH reference and a bromothymol blue reagent.
Read against that reference, a lime green color corresponds to roughly 30 parts per million of CO2, blue means too little, and yellow means too much and a livestock risk.
Its one real limitation is lag. The color trails the real CO2 level by an hour or more, so it is a trend tool rather than an instant meter.
It is also irrelevant on a low-tech tank with no injected CO2.
If you are building a CO2 system from scratch rather than just checking it, that decision has its own criteria and belongs in the aquarium CO2 system chooser.
Setting up and dialing in the light
The order you switch things on decides whether week one is clean or a green mess.
Work from mounting to photoperiod to intensity, and confirm carbon before you push brightness.
Mount and schedule first
Mount the fixture at the maker’s stated height, remembering that a higher mount lowers the light reaching the substrate.
Set a fixed photoperiod of six to eight hours through the built-in scheduler or an outside timer.
A hard daily cap denies algae the surplus that irregular switching hands it.
Start dim, then confirm carbon
Start the dimmer low rather than at full. A new tank has little plant mass and saturates easily, so high early brightness mostly feeds algae.
If you inject CO2, confirm the drop checker reads green before raising intensity toward the medium or high band, because the light must not outrun the carbon.
Ramp by what you see
I set the fixture to a low dimmer step for the fixed six to eight hour photoperiod and hold it for two weeks.
I step the intensity up a single increment only when the plants show no new growth, then I watch the front glass for seven days.
If green film returns within that week I drop back one step, and I hold the last step that produced new growth with clear glass.
The reason for this rule is the saturation curve. Once the plants are saturated, more light does not speed them but does feed algae, so the lowest step that still grows the plants is the efficient setting.
The fixture and its controller stay above the splash line on a dripped cord so mains power never meets tank water.
Read the drop checker on its own clock
On an injected tank I place the checker mid-tank and read it against the lime green reference about one to two hours after the CO2 turns on.
I read it again before lights out, because the bromothymol color trails the real level by around an hour.
I aim for stable lime green by the time the lights come on and adjust the bubble rate only one small step per day.
Blue tells me to raise CO2 one step, and yellow tells me to lower it at once, because yellow signals CO2 at or past the safe zone for livestock.
If the surplus has already shown up as an algae problem, the fix is a balance correction, not just less light, and the aquarium algae control chooser walks through it.
Who should skip each product
The fastest way to overspend is to buy a role you do not need. Each product here has a clear case for not buying it.
Skip the high-ticket RGB fixture when
Skip it if your plant list is entirely low-demand shade plants with no CO2. Their low compensation points mean they saturate at modest light, so the extra power only raises algae risk and cost.
Avoid it on a shallow nano where a mid-tier light already over-delivers at the substrate. Pass on it too if you will never run the dimmer high, because then you are paying for control headroom you will not use.
Skip the budget low-tech LED when
Avoid it the moment you want carpets, bright-light stems, or a red-plant display, because its low output is the false economy that makes plants stall or melt.
Pass on it for a tall tank where attenuation leaves too little light on the bottom.
Skip the timer and the drop checker when
Skip the outside timer if your fixture already schedules itself, since a second scheduler does nothing.
Leave the drop checker on the shelf if you do not inject CO2, because on a low-tech tank it has nothing meaningful to measure.
A precise reading of actual substrate light with a PAR or quantum meter is a separate, more expensive decision that deserves its own guide rather than a line item here.
Maintenance, failure modes, and replacement
An aquarium LED is a power supply working over humid, splashing water for years, so plan for slow decline and a few specific failures.
LED output fades gradually over its life, often described against the point where it reaches 70 percent of its original brightness.
For a planted tank this matters because the light reaching the substrate drifts down slowly. A fixture run near a plant’s requirement can fall below it long before the LEDs look dim.
If previously healthy plants weaken slowly with nothing else changed, suspect output decay and either raise the dimmer or plan a replacement.
The common hard failures are mechanical and electronic rather than the LEDs themselves. A stalled cooling fan lets a fixture overheat, which speeds decay and can trip its thermal cutoff, and a noisy fan is the early warning.
A failed driver or app controller shows up as a fixture that will not dim, schedule, or power on while its LEDs are otherwise fine.
Keep the driver and controller above the splash line, use a drip loop, and run the fixture on a GFCI-protected circuit.
Wipe the lens whenever it clouds, since mineral film and salt creep quietly cut the light that reaches the plants.
Inspect the mounting and fan a few times a year. Plan fixture replacement on a multi-year horizon driven by plant performance or a hard failure, not by a fixed calendar date.
Common questions before you buy
Can I just use a bright desk or shop LED?
It might grow the toughest low-light plants if it happens to land enough light on the substrate, but you cannot verify that from a lumen rating. The spectrum is also not shaped for a planted display.
Such lights lack aquarium-safe mounting, a dimmer, and a scheduler. For anything past a bowl of Anubias it is a gamble.
Do I actually need RGB?
No. A correctly sized non-RGB fixture that lands the right light at the substrate will grow plants perfectly well.
RGB improves color rendering and gives spectral control, so treat it as a preference and a control upgrade rather than a requirement.
Will a cheap mechanical timer do instead of a smart outlet?
For a plain daily on and off, yes. The smart outlet adds remote scheduling, a countdown siesta, and a chosen state after an outage.
Either one beats manual switching, which is what leaves the algae-feeding surplus on the table.
Does more light always mean more algae?
No. More light feeds algae only when it outruns what the plants can use and what the carbon and nutrients can support.
Matched to plant demand and to CO2, a brighter setting grows plants faster without an algae surge.
That balance is the whole reason the dimmer and the drop checker are in this kit.
Putting the decision together
The whole purchase reduces to landing the right amount of light on the substrate, carrying a spectrum you can trust, under a schedule you control.
A full-spectrum programmable fixture is worth its price only when carpets or bright-light stems justify the light it delivers.
A low-tech tank of Anubias and Java fern is better served, and better protected from algae, by a modest fixture and a fixed photoperiod.
Add the drop checker only when you inject CO2 and intend to run brighter, and add an outside timer only when the fixture cannot schedule itself.
Start dim, confirm carbon before you climb, and let the plants and the front glass tell you where to stop.
The substrate itself works with the light to drive growth, a parallel decision covered in the planted tank substrate chooser.
If a carpet is the goal, the light demand there is covered in the dwarf hairgrass carpet guide.
Affiliate Disclosure
This article contains Amazon affiliate links. As an Amazon Associate I earn from qualifying purchases. If you use these links, the site may earn a commission at no extra cost to you. Product availability, price, and specifications can change. Check the current listing before buying.