
Grow Bucephalandra Emersed Without Algae or Rhizome Rot
Learn to grow Bucephalandra emersed with an exposed rhizome, airy moisture, gentle ventilation, and practical algae and rot checks.
Priya Patel · Published 2026-09-03 · 15 min read
Key Takeaways
- Keep the Bucephalandra rhizome exposed and easy to inspect.
- Keep roots moist while preventing puddles and stagnant wet pockets.
- Use gentle ventilation to shorten condensation and leaf-wetness periods.
- Reduce excess light, water, or fertilizer before reaching for chemicals.
- Treat a soft rhizome as a rot problem and isolate it promptly.
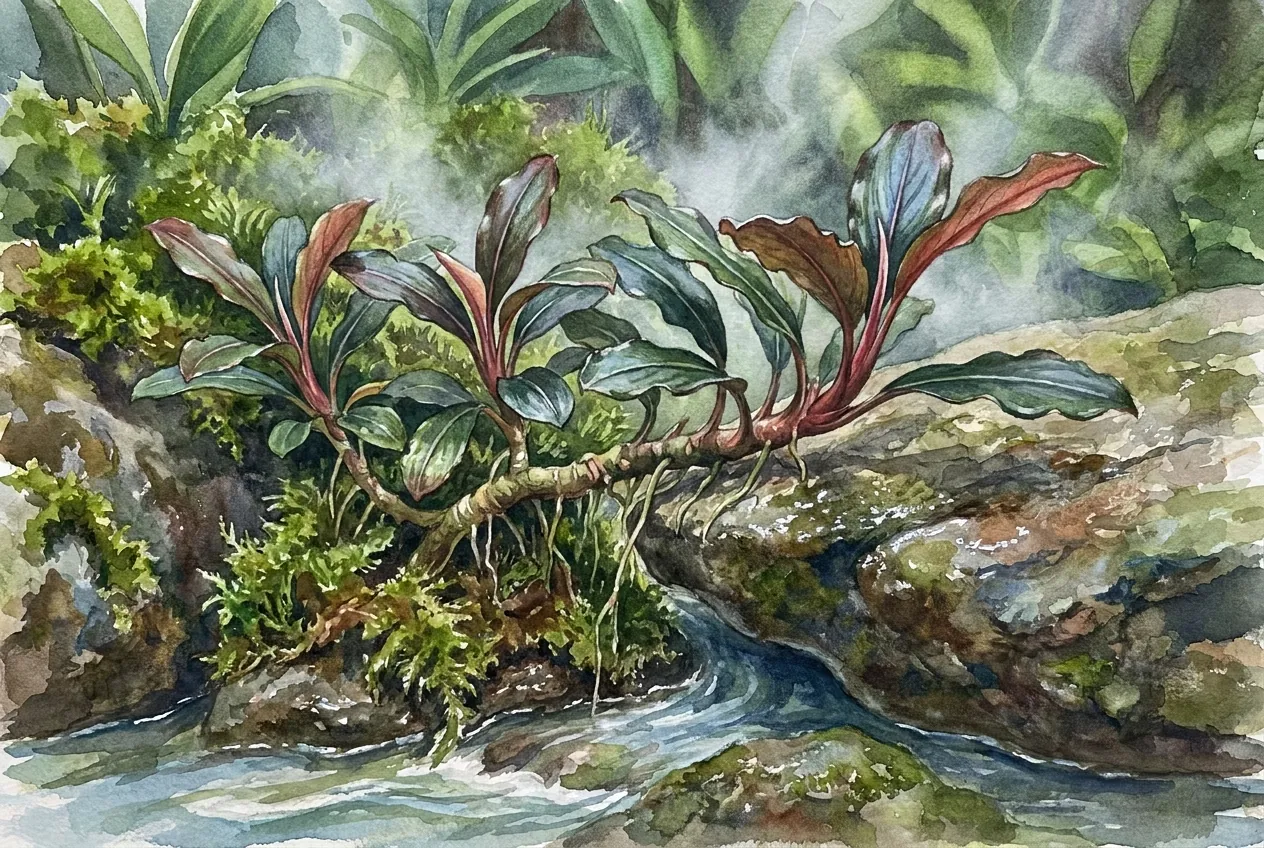
Bucephalandra can grow well above water when the leaves stay hydrated, the roots have a moist but airy support, and the creeping rhizome remains visible. The common failure is not simply too much water. It is moisture trapped in the wrong place, combined with light and nutrients that let algae spread before the slow-growing plant can cover the surface with new tissue.
The reliable approach is to design the box around observation. Keep the rhizome exposed, keep the support damp rather than ponded, vent a sweating enclosure, and change one environmental driver at a time when algae appears.
Why Bucephalandra can grow emersed
Bucephalandra is a rheophytic aroid. That means its natural setting is associated with stream-influenced rock and margins, where water availability and air exchange can coexist.
A captive box should copy that relationship rather than treating the plant as a stem that belongs under a permanently stagnant layer.
What rheophyte means in a home setup
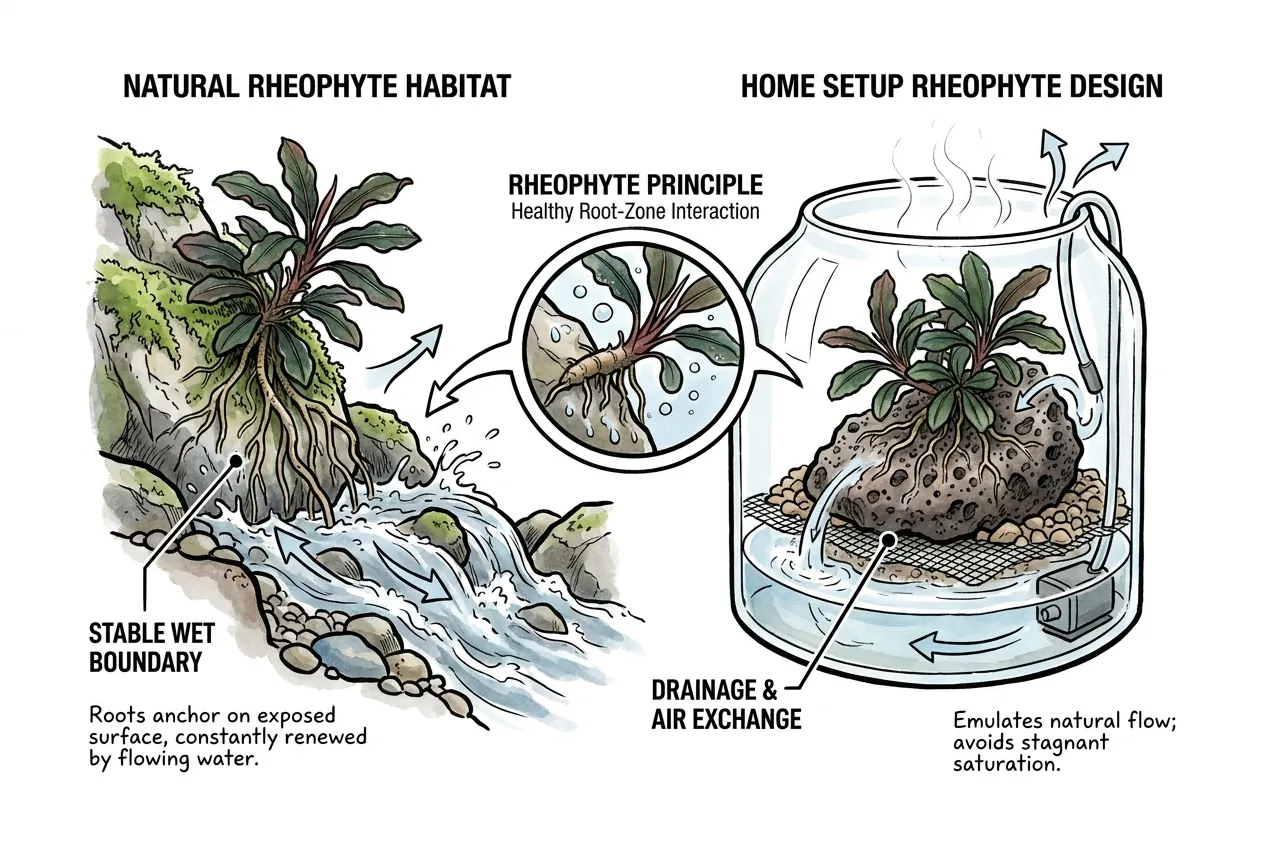
The word describes an ecological relationship, not a complete care recipe. The genus is native to Borneo, and recent taxonomic work describes Bucephalandra as an endemic rheophyte genus.
The important cultivation clue is that the plant can sit close to water while remaining attached to an exposed surface.
That is why a rock, mesh, mineral support, or open sloped medium can work. The goal is a stable wet boundary around the roots, not a sealed covering over the rhizome.
Water movement in nature also carries away debris and renews the contact between the plant and its surroundings.
A closed box has to provide the useful part of that arrangement through drainage, spacing, and air exchange.
Use the rheophyte label to guide the root-zone design, not to justify stagnant saturation.
Emersed leaves do not justify a buried rhizome
The rhizome is the plant’s horizontal growing axis. Leaves and roots emerge from it, so it needs to remain inspectable and exposed.
Tropica’s plant record gives the same warning in direct cultivation language. Covering the creeping rhizome can cause the plant to rot and die.
Emersed leaves may look firmer or more terrestrial than aquarium leaves, but that visual change does not move the rot boundary.
Secure the plant by its roots or by a separate support point. If media creeps over the rhizome after watering, brush it away before it stays wet against the stem.
Keep the rhizome exposed even when the roots are fully surrounded by moist support.
Build a wet but airy root zone
The best emersed support is not the one that holds the most water. It is the one that gives the roots access to moisture while leaving pathways for air and making the rhizome easy to inspect.
Expose the rhizome and support the roots
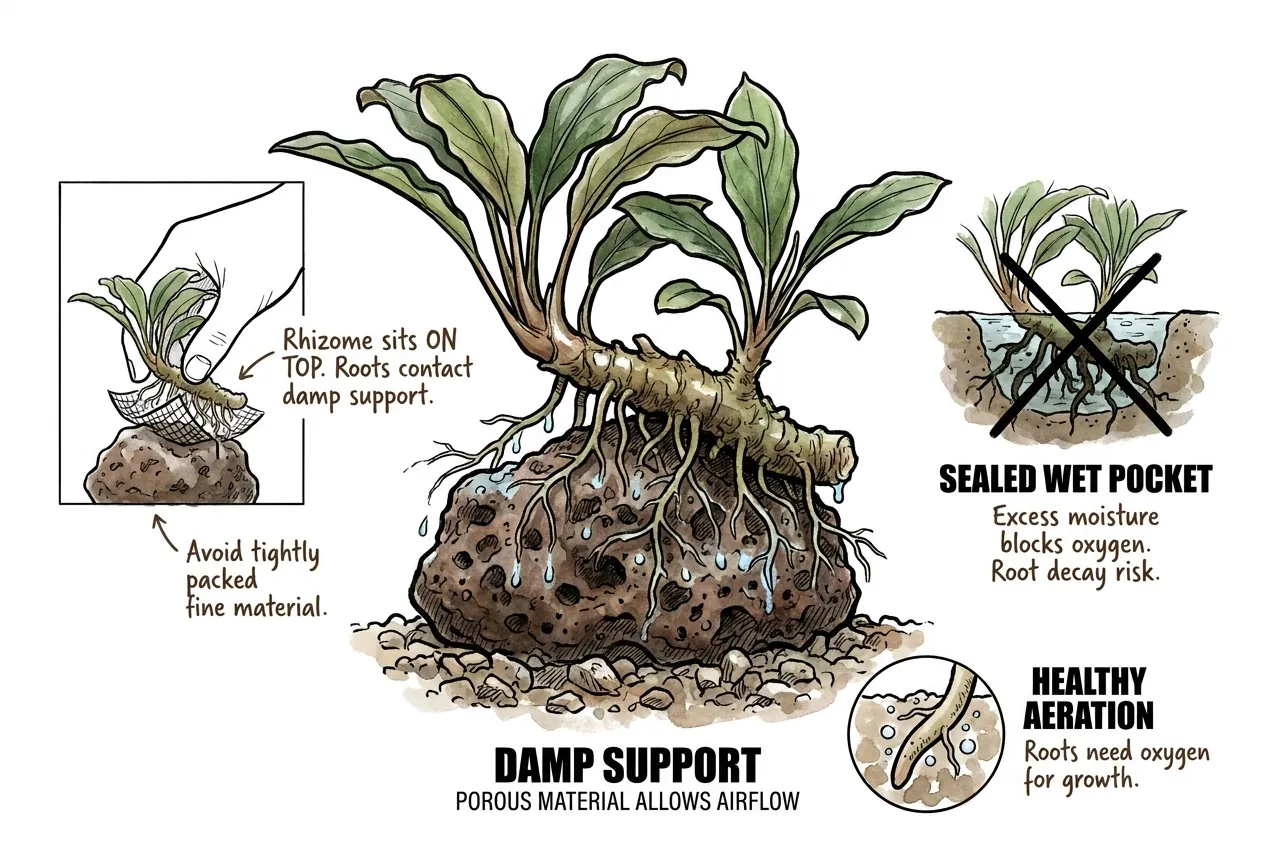
Place the plant so the roots contact the damp support while the rhizome sits on top.
A small rock or open mesh can hold it in place until the roots grip.
Avoid packing fine wet material tightly around the stem. Decaying debris adds another source of nutrients and makes a soft spot harder to see.
UC IPM describes aeration as the movement of air through pore spaces. Roots need that oxygen for growth and for the uptake of water and nutrients. When excess moisture fills the air spaces, root asphyxiation and decay problems can act together.
Use the signs together rather than treating one as proof. Slow drainage, a ponded surface, or a sour odor point back to the support. They do not justify burying the rhizome or adding fertilizer.
The practical symptom is a support that never changes. If the surface remains glossy with pooled water, or the area smells sour, correct the moisture pattern before adding fertilizer.
A damp support can be healthy. A sealed wet pocket is the warning.
I photograph the same exposed side of the rhizome after watering and again one week later at the same time of day. I inspect the support directly beneath it without squeezing the plant.
If water is still pooled there, I lower the water level or open the drainage path.
If the rhizome itself becomes soft, I isolate the plant and remove only clearly decayed tissue with a clean blade.
The weekly interval is my early-detection routine, not a published species threshold.
The useful distinction is moist roots with air access versus a wet pocket that excludes air around the rhizome.
Choose support by behavior, not brand
Mineral or inorganic support is useful because it can hold moisture without decomposing around the plant.
A Royal Botanic Garden Edinburgh cultivation paper describes wholly inorganic media as a way to reduce root-rot incidence in difficult Malesian rainforest plants.
It also reports successful cultivation with pots sitting in water when the medium was suitable.
That evidence does not create a universal Bucephalandra recipe. It supports a decision rule.
If a support stays open, drains excess water, and lets you see the rhizome, it is behaving in the right direction.
If it compacts into a dark, airless plug, its label matters less than its failure mode.
Do not select a support only because it is called mineral or inert. Fine material can still pack together, and an organic component becomes a problem when it turns into a wet, decaying pocket. Watch what happens after the normal water level is restored.
A useful support keeps three conditions separate. Roots stay in contact with moisture, water can leave the upper surface, and the rhizome stays visible enough to inspect.
If one condition fails, change the support or water level before adding another input.
Do not copy a water tray blindly. The same paper contrasts a suitable inorganic structure with traditional mixes that can remain too wet.
Keep the reservoir below the rhizome and let the support draw moisture upward. If the support stays flooded, remove water rather than compensating with more ventilation alone.
Use water as a supply, not a stagnant bath
Moisture should reach the roots without keeping every surface wet. A shallow lower reservoir, wick, or damp mineral bed can work if the rhizome remains above it and the support has space for air.
The more enclosed the box, the more often you should inspect for pooling rather than assuming a high water level is harmless.
When watering, wet the support evenly and remove any puddle that touches the rhizome. Watering earlier in the light period gives wet leaves more time to dry. If the plant is already declining, correct the support and wait for a stable response before feeding or changing the light.
Treat water level and support structure as separate controls. Lowering a reservoir changes the moisture supply.
Opening or replacing a compacted support changes the route for air. The visible rhizome helps show which control needs attention.
When the support supplies moisture without a puddle at the rhizome, leave the water level alone and observe it.
When the upper support stays glossy or drainage slows, lower the water or open the support first.
Do not rely on stronger ventilation to correct a flooded root zone.
Use the next check to decide whether an adjustment worked. A support that drains but leaves the roots dry needs more moisture supply.
A support that stays wet at the rhizome needs a lower water level or a more open structure.
The two failures need opposite adjustments, so do not correct both with ventilation.
Balance humidity, condensation, and airflow
Humidity protects an emersed leaf from drying too quickly, but humidity readings do not tell you how long water is sitting on the plant.
Condensation, puddling, and the smell of stagnant media are more useful signals in a small box.
Watch the duration of surface wetness
UConn Extension identifies water, light, and mineral nutrients as the basic ingredients for algae growth. It also recommends reducing excessive moisture and improving ventilation in greenhouse production. In a closed container, those recommendations become a simple observation routine.
Look at the leaf surfaces, the media, and the lid. A little condensation that clears as the enclosure warms is different from a lid that remains wet while the rhizome sits in a puddle.
If leaves stay coated for long periods, reduce the amount of free water before lowering humidity aggressively.
The box should feel humid without becoming a rain chamber. Leave enough spacing for air to move between clumps. Remove dead leaves because they hold moisture against healthy tissue and later become a nutrient source.
Read the lid, leaves, and root support as separate surfaces. A wet lid points to an air-exchange decision.
A wet leaf points to the timing of water and air movement. A wet support that pools at the rhizome points to drainage.
Change the smallest matching control first. Opening a lid gradually is different from lowering a reservoir. Moving room air around the enclosure is different from aiming air at the plant.
Add gentle exchange
Use a small fan to move room air around the enclosure rather than aiming a strong stream directly at the leaves.
Keep the fan outside the splash zone, use a GFCI-protected outlet, and keep the cord and plug dry.
The purpose is to break up stagnant air and shorten the wet period. If the leaves wilt or develop crisp edges after the change, the airflow is too aggressive or the enclosure is too dry for the current plant.
Ventilation is a surface-wetness tool. It can help a humid box clear droplets and stale air.
It cannot turn a puddle around the rhizome into a healthy root zone. Correct that puddle through the water level, support structure, or drainage.
Open the enclosure gradually when condensation is persistent. Keep the plant away from a hot lamp and from direct drafts. A stable, slightly ventilated box is easier to diagnose than a sealed box that alternates between saturated and dry conditions.
Control algae by removing an input
Algae often reflects light, moisture, and nutrient conditions. Scraping the film can improve appearance, but it will return if the same favorable conditions remain.
Bucephalandra grows slowly, so a leaf that is already coated may not show a quick recovery after a light change. Use new growth and the marked algae patch together. If the plant remains firm and hydrated while the patch expands, reduce excess light exposure or nutrient availability before increasing the lamp.
Do not raise light simply because a leaf looks weak. A pale, stretched leaf and a glossy leaf covered with green film call for different checks.
Settle moisture and nutrient conditions before deciding that the lamp needs to be stronger.
Separate cosmetic film from root-zone trouble
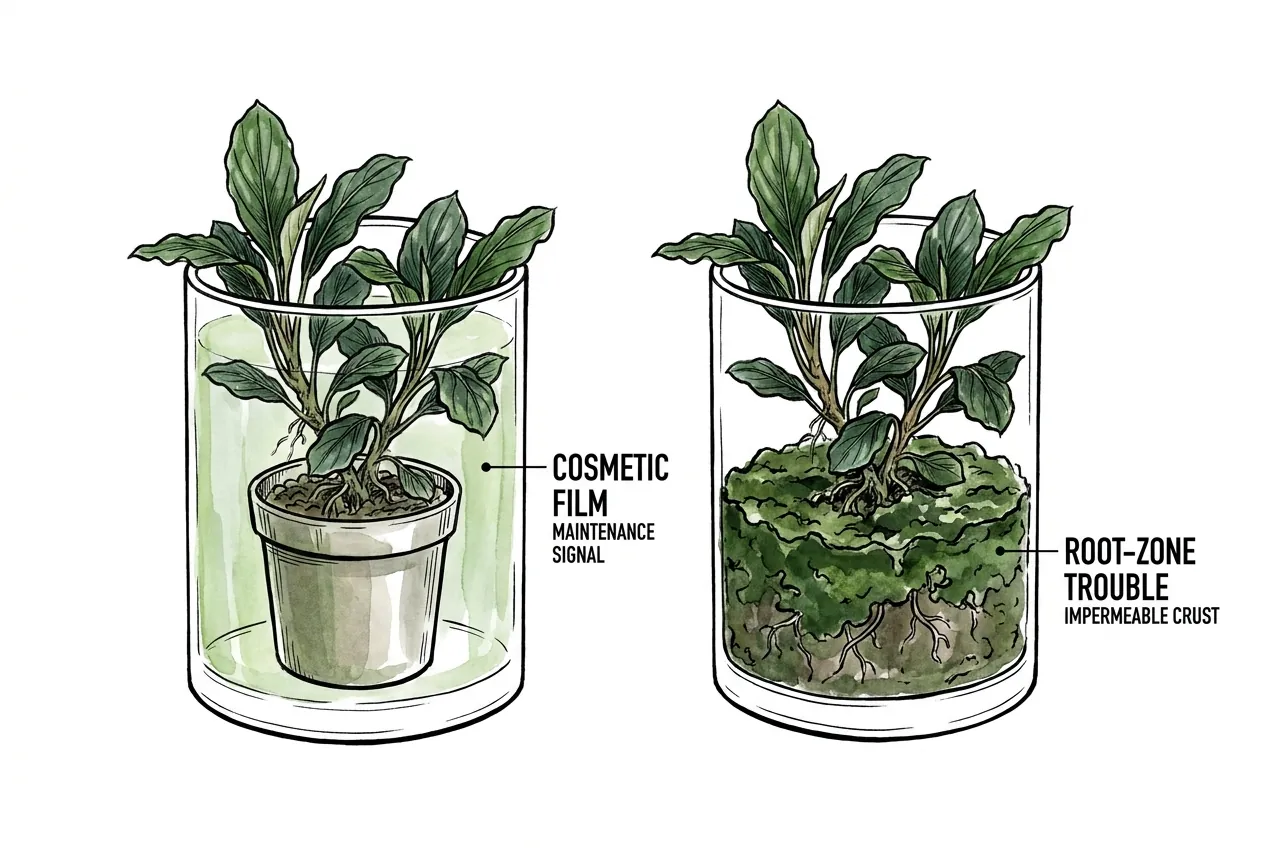
A thin film on a wall is mainly a maintenance signal. A film that covers the support can interfere with water penetration. UConn Extension notes that algae on growing media can form an impermeable crust and compete with desirable plants for nutrients.
Start with the location. If algae is on the lid or glass, clean the surface and check light exposure.
If it is on the support around the roots, reduce puddling and remove decaying material. If it is on slow-growing leaves, inspect light duration and fertilizer before using any treatment.
Avoid applying an algae-control chemical directly to the plant unless its label explicitly allows that use.
UConn warns that many algaecides are not labeled for direct plant treatments and can injure plants.
Change one driver at a time
I mark one container corner and photograph it weekly at the same time of day before cleaning.
I keep water, fertilizer, and ventilation steady while testing a single adjustment.
If algae expands while the plant stays turgid, I reduce excess light duration or nutrient exposure first.
If the leaves wilt or crisp, I restore moisture before changing light again.
This routine is deliberately slow. Changing the lamp, reservoir, fertilizer, and lid at once may produce a prettier box, but it will not reveal which condition caused the algae.
Oklahoma State Extension recommends blocking light from exposed nutrient solution, avoiding puddling, reducing excess nutrients, and sanitizing surfaces between crops.
Those are environmental controls, not a reason to pour a treatment over the plant.
Use the photograph as a comparison, not a scorecard. A smaller patch after one change is useful only when water, fertilizer, and ventilation have stayed steady.
If another condition changed, restore a stable setup before deciding which driver was responsible.
Feed lightly and read new growth
Fertilizer should support active growth, not compensate for a wet or declining rhizome. Extra nutrients can benefit the plant and the algae at the same time, especially when water remains exposed on the support or container walls.
Treat new growth and algae as paired signals. New growth does not prove that a stronger feed is needed.
Algae after feeding does not prove that light is the only problem. Check the support for ponding and the rhizome for firmness before changing the nutrient input.
Nutrients are not a rescue tool
If the rhizome is soft, correct the root-zone condition first. Fertilizer salts do not restore damaged tissue.
If leaves are firm but new growth is weak, check the light and moisture pattern before increasing the feed.
A plant that is not taking up water normally is a poor candidate for a stronger nutrient solution.
Use a complete fertilizer conservatively when the plant is clearly growing. Keep concentrated fertilizer off the rhizome and do not leave nutrient-rich puddles in the box. Rinse or replace a support that has accumulated residue instead of escalating the dose.
Avoid nutrient-rich puddles
UConn Extension recommends avoiding excessive fertilizer and runoff in greenhouse production. Oklahoma State Extension similarly identifies excess nutrients as a driver of algae and recommends reducing nutrient sources. The home-scale translation is straightforward.
Keep fertilizer in the root zone, keep the rhizome dry enough to breathe, and remove dead material before it decomposes in the water.
If the source water is unknown, do not diagnose every symptom as deficiency. Hardness, existing minerals, light, and moisture all change how the plant responds. Stabilize the environment first.
A clean, firm rhizome with steady new growth tells you more than a single dramatic change in leaf color.
Diagnose before you reset the whole box
The fastest way to lose a slow plant is to react to every leaf problem by changing the entire setup.
Inspect the rhizome, support, drainage, condensation, and recent changes in that order.
That order keeps a cosmetic symptom from becoming the diagnosis. A yellow or damaged leaf can follow a transition, heat, mechanical damage, excess wetness, or decay.
The rhizome and the support tell you whether to hold steady or contain a rot problem.
Leaf loss is not a rhizome diagnosis
A lost or damaged leaf tells you that a leaf failed. It does not identify whether the cause was transition stress, excess wetness, heat, mechanical damage, or decay. The rhizome supplies the more useful signal.
Firm tissue and an intact growing point justify stability and observation. Soft tissue that is darkening or advancing requires isolation and action.
UC IPM lists slow drainage, ponding, rotten-egg odor, and discolored or water-soaked roots among signs associated with aeration deficit. Use those clues together. A single yellow leaf beside a firm rhizome is not equivalent to a soft rhizome sitting in stagnant media.
Use a contained recovery sequence
Isolate a suspect plant from healthy stock. Rinse loose debris away with clean water. Inspect the rhizome without squeezing it.
Keep every firm portion exposed on an open support. Remove dead leaves promptly. Improve drainage or ventilation before resuming fertilizer.
Use a clean blade for clearly decayed tissue and keep the cut away from firm growing points. Do not improvise a pesticide or disinfectant dose on the plant.
If decay continues, discard contaminated support and clean the container before reuse. A plant that remains firm should be left stable long enough to show whether new growth resumes.
The goal is not to sterilize every surface. It is to stop the combination of stagnant wetness, trapped debris, and excess nutrients that allows a small problem to become a rhizome problem.
When the rhizome is firm, stability is part of treatment. When it is soft, isolation and removal of decay come before optimization.
| Recovery stage | What to do |
|---|---|
| Initial assessment | Isolate the suspect plant, rinse loose debris with clean water, and inspect the rhizome without squeezing it. |
| Treatment | Keep firm portions exposed, remove dead leaves, and improve drainage or ventilation before resuming fertilizer. |
| Recovery phase | Use a clean blade only for clearly decayed tissue, keep cuts away from firm growing points, and leave firm tissue stable while new growth is observed. |
| Decision endpoint | If decay continues, discard contaminated support and clean the container before reuse. |
A repeatable emersed routine
Start with the rhizome visible on a clean, open support. Add enough water to keep the roots from drying, then remove any puddle that touches the rhizome. Keep light moderate and steady.
Vent a sweating enclosure until the surfaces dry in a predictable pattern. Feed only after the plant is actively growing and the support is draining.
At each check, inspect the same places in the same order. Look at the rhizome, the root support, the leaf surfaces, the lid, and the water line. Record the change you made and the signal that followed.
If algae is expanding, remove a favorable input. If the plant is drying, restore moisture. If the rhizome is soft, isolate it.
The best emersed Bucephalandra setup is therefore modest. It keeps the plant hydrated without burying the stem and gives roots contact with moisture without suffocating them. It also makes the cause of a problem visible before the slow-growing plant runs out of time.
Key Takeaways
- Keep the Bucephalandra rhizome exposed and easy to inspect.
- Keep roots moist while preventing puddles and stagnant wet pockets.
- Use gentle ventilation to shorten condensation and leaf-wetness periods.
- Reduce excess light, water, or fertilizer before reaching for chemicals.
- Treat a soft rhizome as a rot problem and isolate it promptly.