
Harvest & Store Black Nebula Carrots for Sweetness
When and how to harvest Black Nebula carrots: reading maturity from your seed packet and a sample root, why cold weather can sweeten carrots, how to lift them without snapping, and cold, humid storage near 32°F.
Samuel Reed · Published 2026-02-20 · 10 min read

Key Takeaways
- Use your seed packet's days-to-maturity as a starting point, then pull a sample root to judge size, texture, and taste before harvesting the row. Black Nebula is often listed around 75–80 days, but the actual window shifts with seed lot, sowing date, soil, and weather.
- Cold weather can sweeten carrots in some cultivars as roots convert stored starch to sugar. The effect depends on variety, temperature, and duration, so treat it as a possibility rather than a guaranteed recipe.
- Loosen the soil with a fork alongside the roots before lifting rather than pulling harder. This reduces snapped-off tips.
- Trim the tops soon after pulling to slow water loss. Clean gently, dry the roots, and cool them promptly before storage.
- Store carrots cold and very humid, near 32°F. In milder areas you can also hold them in the ground under heavy mulch and lift them before they bolt in spring.
Use the seed packet and a sample root to choose the harvest window, then lift gently and cool the carrots quickly for storage. These steps work for Black Nebula across a range of U.S. climates, but the actual harvest date follows local weather and soil conditions.
How do you know when Black Nebula carrots are ready to harvest?
Start with two checks
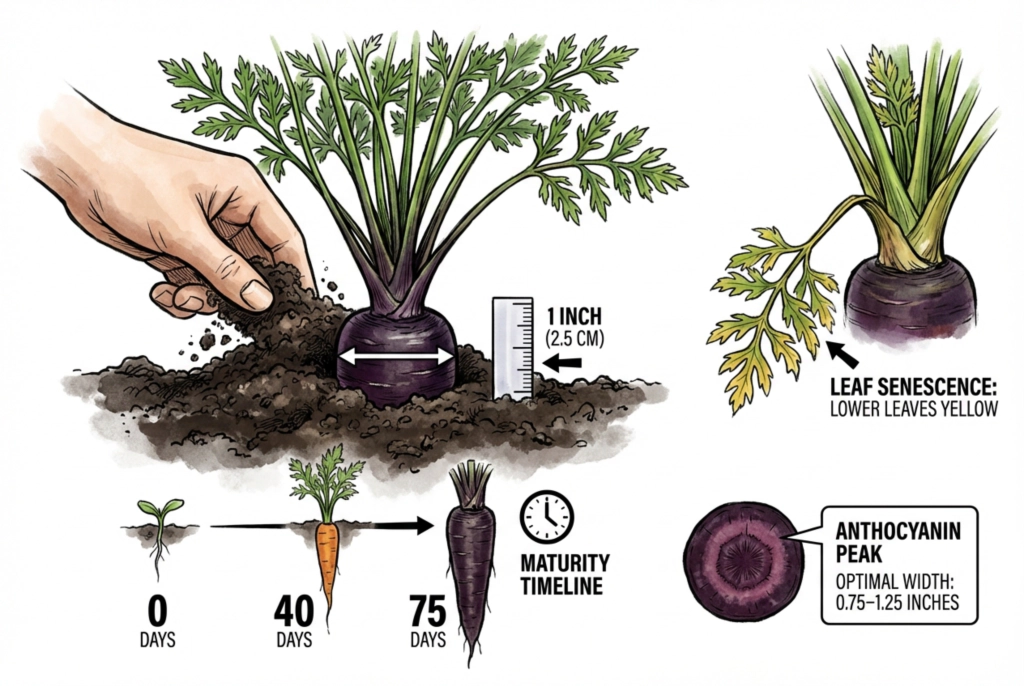
Use the days-to-maturity printed on your seed packet and inspect a sample root.
Commercial catalogs list Black Nebula anywhere from about 75 to 80 days, and figures like diameter and color vary by seed lot, sowing date, soil, and weather.
Days-to-maturity is an estimate, so use it as a checkpoint rather than a deadline.
Once you are near that window, brush the soil away from a crown to see how wide it has grown, then pull one root to check its size, texture, and taste.
Carrots can be harvested progressively from usable size onward, so there is no single day at which the whole row must come up.
Color varies by seed lot and growing conditions. A darker shoulder confirms that purple pigment is present, but it does not tell you whether the root is mature, sweet, or ready to store. Some Black Nebula strains are purple through to the core, while others have a paler core.
The foliage can shift over the season as well. Older lower leaves may yellow with normal aging, but yellowing can also signal nitrogen deficiency, water stress, or disease such as aster yellows or leaf blight, so it is not a reliable harvest signal on its own.
I pull one sample from each end of the row and one from the middle, then label them before washing. Carrot size and moisture can change along a bed, so one impressive root near the irrigation inlet is a poor reason to harvest everything.
A thin piece from the crown and lower root of each sample gets tasted at the same temperature. If the center remains woody or bland while the ends are ready, I harvest in sections. I leave the uneven part to develop rather than forcing one date on the whole planting.
How do different USA growing zones affect the harvest timeline?
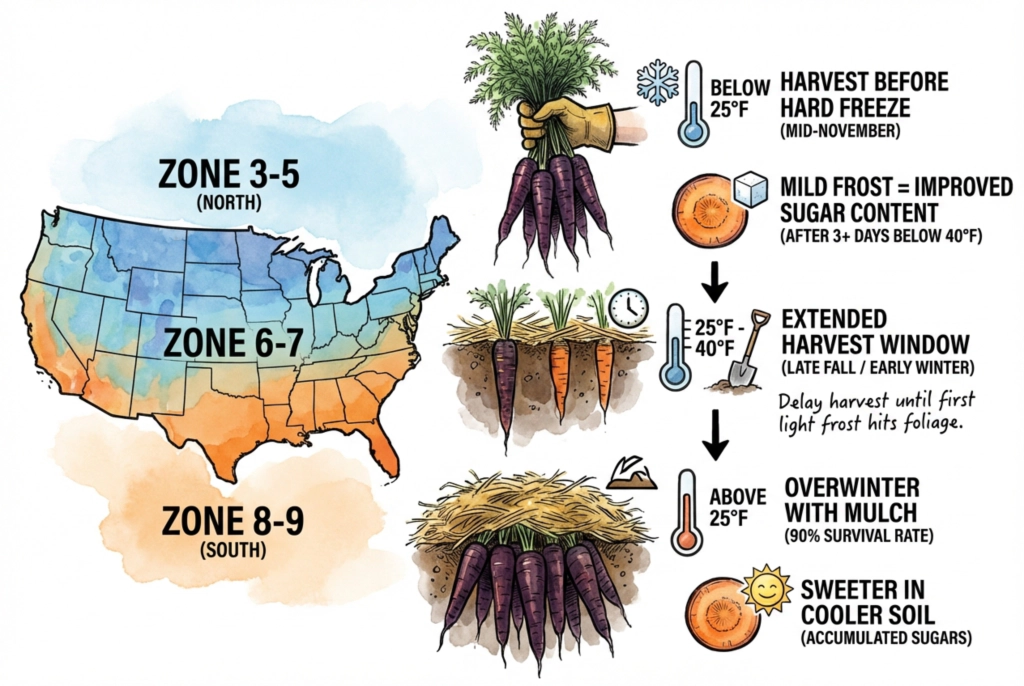
Harvest timing depends on your local climate, but it is worth being clear about what actually drives it.
USDA hardiness zones are based on the average annual extreme minimum winter temperature and are meant as a general guide to whether a perennial can survive the cold in your area.
They are not a harvest calendar for an annual vegetable like a carrot, and they do not tell you your first-frost date, growing-degree days, or when the soil will freeze.
For timing, use your local first-frost normals, the current forecast, and soil temperature instead.
In colder areas, plan to lift the crop before the ground freezes hard, watching the forecast rather than a fixed temperature threshold.
In milder areas, you can often leave carrots in the ground and harvest through winter under mulch (see the overwintering section below).
Cold weather can sweeten some carrot cultivars as stored starch shifts toward sugars. The effect varies by variety, temperature, and duration, so do not use one light frost as a harvest trigger.
Lift the crop before the roots freeze rather than risking the harvest for a possible sweetness gain.
The Roots of Plant Frost Hardiness and Tolerance
How do you pull them without snapping the root?
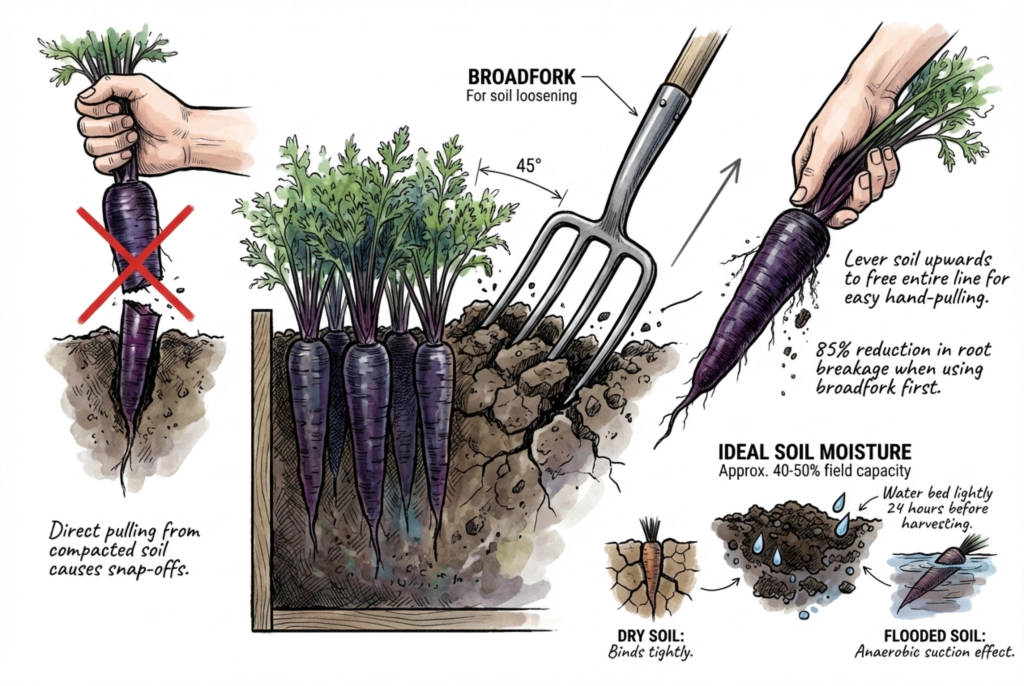
The best way to avoid snapped roots is to loosen the soil before you lift, rather than pulling harder.
In firm or compacted ground a carrot's taproot can break rather than pull free, especially if you tug it straight up, so freeing the soil first is the reliable fix.
Work a garden fork or broadfork into the ground alongside the row, close enough to loosen the soil around the roots but far enough that the tines do not spear the long roots, and rock it gently to break the soil's grip.
Then lift each carrot by its crown and base. Work along the row in sections so the whole line loosens for easy hand-lifting.
Soil moisture matters too. Slightly moist, workable soil is easiest. Soil that is bone dry tends to grip the roots, while soil that is waterlogged turns to mud, compacts, and makes clean handling harder.
Watering the bed lightly the day before can help if the soil is dry, but skip it after rain or in poorly draining ground. Check the actual moisture rather than watering on schedule.
A broadfork works well for loosening a whole bed of soil without slicing through roots the way a spade can.
It is not always the right tool for a single short row, though. A smaller, cheaper spading fork is easier to place precisely between roots, and a large broadfork can catch nearby carrots if you are not careful.
Choosing a loosening fork
A full-size broadfork suits an established bed, but it can be too wide and heavy for a single narrow row. Compare tine length, working width, tool weight, and spacing with the bed before buying, and place it carefully to avoid spearing nearby roots.
A narrower spading fork is often easier to position between roots in a small planting.
What should you do immediately after pulling?
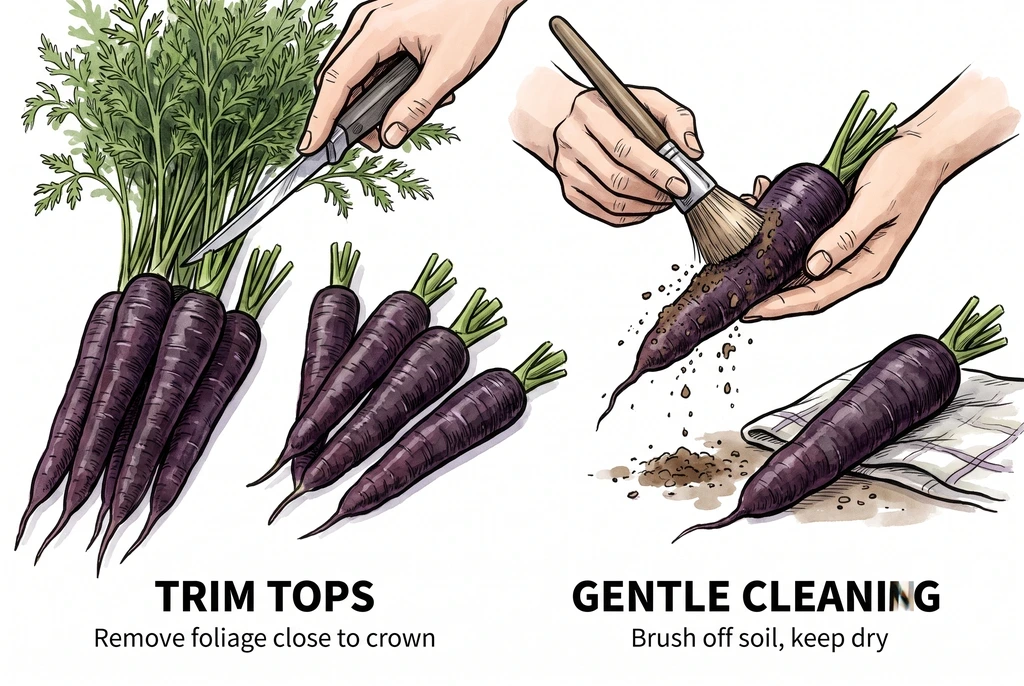
Trim the green tops off before storage. The attached leaves keep transpiring after harvest, drawing water out of the root, so removing them soon after pulling helps the carrots hold their moisture.
Twist or cut the greens off close to the crown, leaving a short stub.
Guidance on washing is mixed. Extension services often suggest cleaning or washing carrots and then drying them before storage, and commercial handlers wash and cool them routinely.
The real risks are rough scrubbing, which abrades the skin, and leaving free moisture on the roots, which encourages decay.
So handle them gently, whether you brush off loose soil or rinse them, then dry and cool them promptly.
Set aside any bruised or damaged roots to use first, since they store poorly.
What are the best ways to store them long-term?
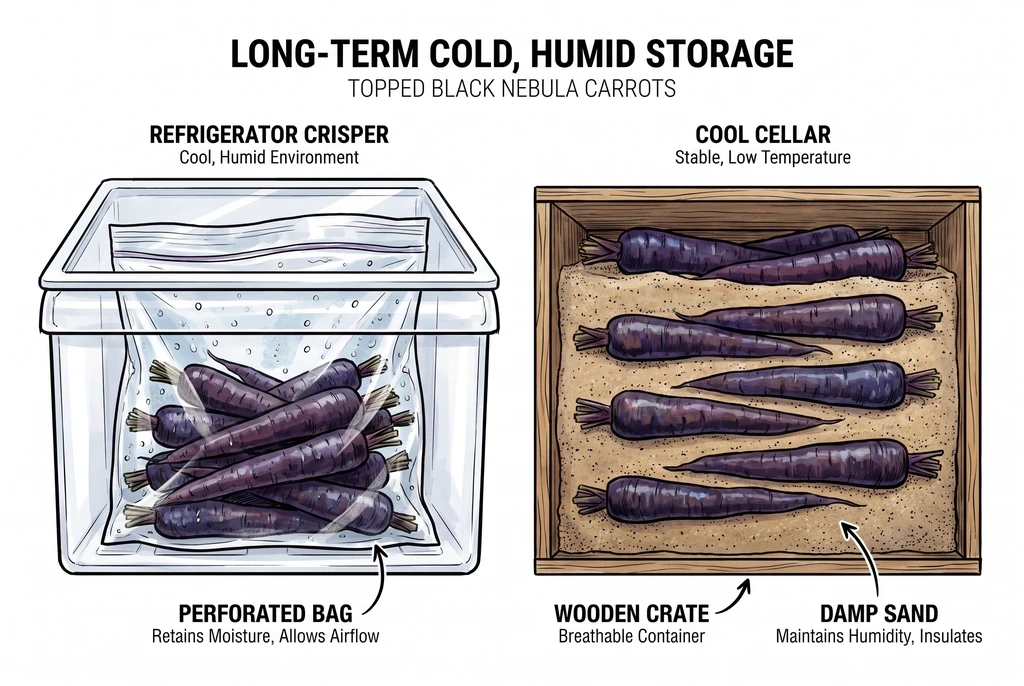
Carrots keep longest when stored cold and very humid. The UC Davis postharvest guidance for mature topped carrots is 0°C (32°F) at 98–100% relative humidity, where they can hold for roughly 7 to 9 months. At the more common 3–5°C (about 37–41°F), that drops to about 3 to 5 months.
Respiration and starch breakdown slow as the temperature falls toward freezing, which is what extends shelf life.
These figures are expected ranges under good conditions, not guarantees.
A home refrigerator is warmer and drier than that ideal, often around 40°F and 50–60% humidity, so real-world storage life is usually shorter.
In the crisper, keep the topped roots in a perforated plastic bag to hold moisture without trapping condensation. A cool, unheated cellar packed in boxes of damp sand or peat is another option.
Whichever you use, keep the roots away from apples, pears, and other ethylene-producing produce. Even about 0.5 ppm ethylene can develop a bitter (isocoumarin) off-flavor in carrots within a couple of weeks.
Check periodically and remove any root that starts to rot before it spreads.
High humidity is what keeps carrots crisp rather than rubbery, since they lose water quickly into dry air.
Aim for very high humidity, but avoid free water and condensation on the roots, which encourage decay, and keep the temperature just above freezing. Below roughly −1°C (about 29°F) the roots can suffer freezing injury.
A cheap hygrometer is useful for spot-checking if you store in bulk.
Choosing a hygrometer
An inexpensive humidity monitor suits a quick spot check, but many indoor units are not waterproof and lack logging or alarms. Keep one clear of condensation. If storage depends on tight control, compare the sensor with a reference and choose a logging or alarm-equipped monitor rated for high humidity.
| Method | Conditions to aim for | Watch out for |
|---|---|---|
| Fridge crisper | Topped, dry, perforated bag. Coldest drawer, as humid as it runs | Home fridges run warm (~40°F) and dry, so life is usually shorter. Keep away from apples/pears (ethylene). Check for soft spots |
| Root cellar in damp sand/peat | Near 32°F, very high humidity, good airflow | Freezing risk below ~29°F. Condensation and free water cause rot. Inspect regularly and remove any rotting root |
| Left in ground under mulch | Heavy mulch over the row in milder areas | Depth needed varies with climate, snow, and soil. Watch for rodents. Lift before spring bolting |
Carrot. Postharvest Recommendations
Can you leave them in the ground over winter?
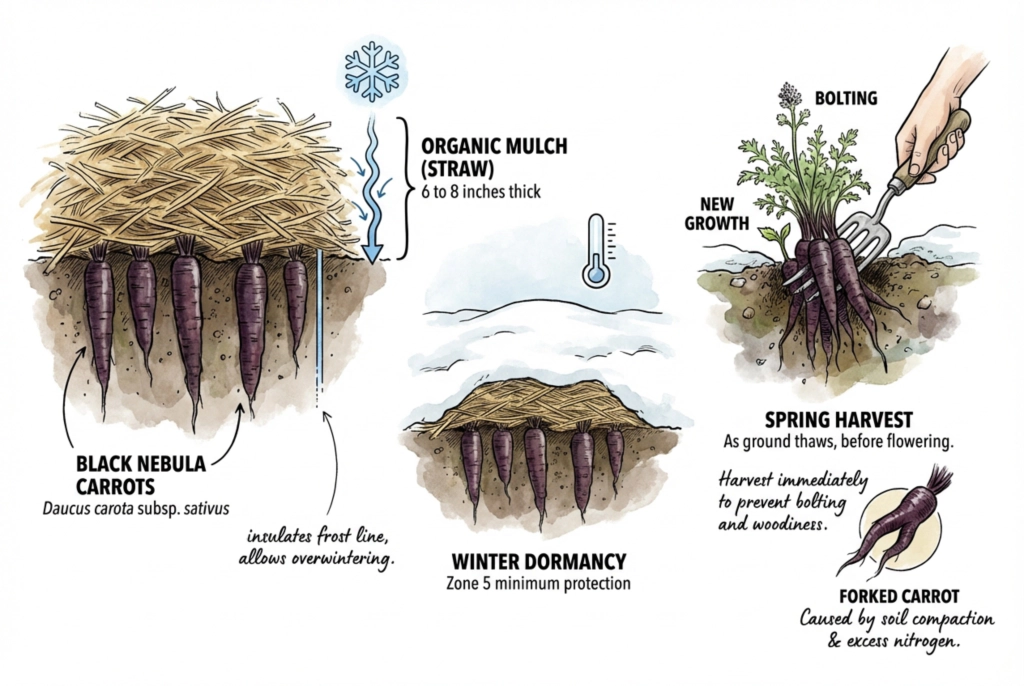
In milder climates you can skip the cellar and hold carrots where they grew. A thick layer of straw over the row insulates the soil and slows how deep the frost reaches, since loose straw traps insulating air.
How much you need, often several inches, sometimes more, depends on your climate, snow cover, wind, soil moisture, and drainage, so treat any single figure as a starting point rather than a guaranteed frost barrier.
Pile the mulch on before the ground freezes hard, then harvest through the cold months as you need them, digging when the soil is workable rather than forcing frozen ground.
Carrots are biennials, so after a cold winter they can bolt (send up flower stalks) in their second season, and bolting roots turn woody.
Watch for regrowth as the ground warms in spring and lift what remains before it bolts, judging the timing by your own conditions.
What causes forked or misshapen carrots?
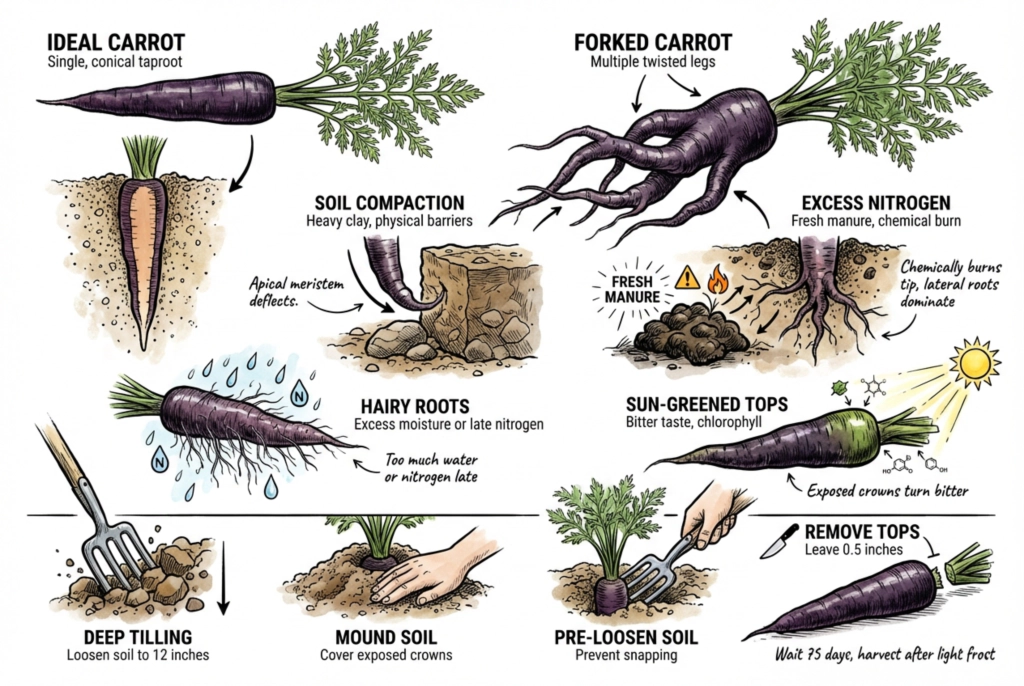
Forking often traces back to something that damaged or obstructed the growing tip of the taproot early in development. A stone, a clod of compacted soil, or physical injury to the root tip can make the root branch into several twisted legs instead of one clean cone.
Fertilizer can play a role too (concentrated fertilizer or fresh manure placed near the roots can injure them) but there are several distinct causes, so it is worth diagnosing rather than blaming a single factor.
Heavy, compacted, or stony soil is a common culprit. Loosen the bed deeply, remove stones before sowing, and avoid mixing fresh manure into the bed.
Hairy or fibrous roots can have several causes of their own, excess nitrogen, uneven moisture, and problems such as root-knot nematodes or aster yellows among them, so treat them as a symptom to investigate rather than a single fix.
Prevent green shoulders
Crowns that push up out of the soil and catch sunlight turn green from chlorophyll, and the green portion can taste bitter.
A separate bitter off-flavor from isocoumarin is mainly linked to postharvest stress and ethylene rather than sun exposure.
Mounding a little soil over exposed shoulders during the season prevents the greening.